概念
1.小程序云开发,让前端程序员拥有后端的能力
2.包含:云函数(nodejs)、云数据库(mogodb)、云存储
3.前端写好函数->上传到云服务器 实现自定义云部署
4.前端去调用云函数,间接通过云函数对数据库的操作
5.前端->全栈
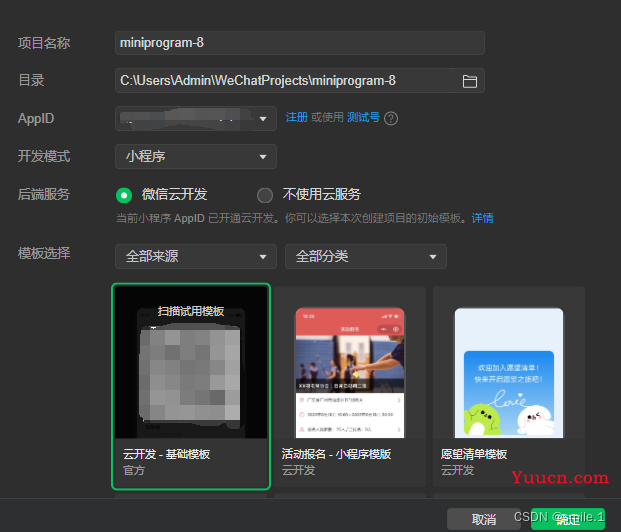
创建云开发项目
创建云数据库
1.创建集合
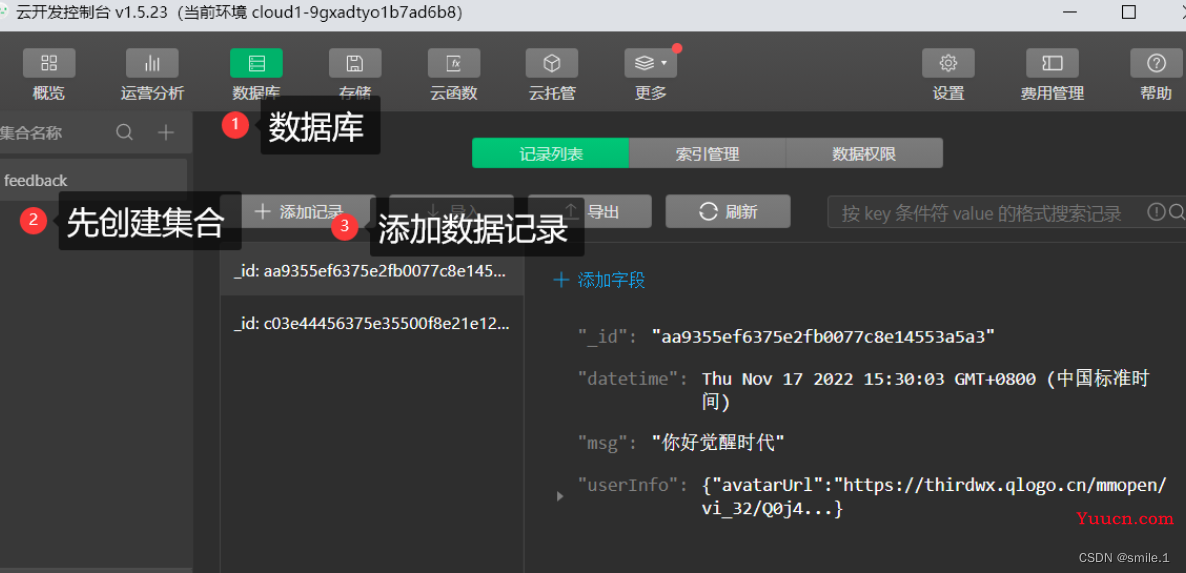
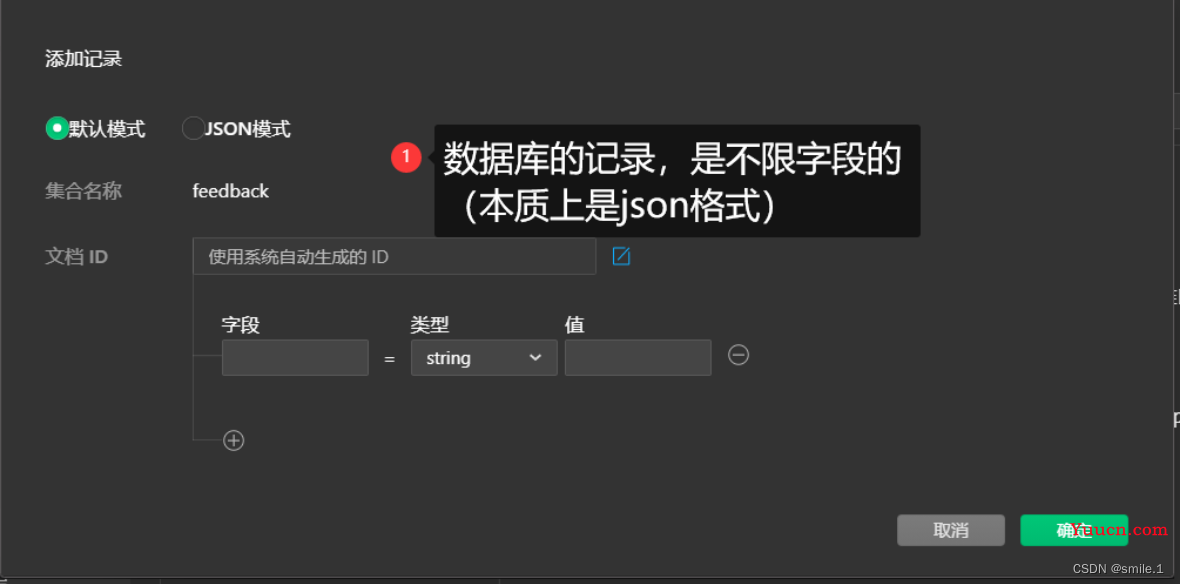
2.添加记录
使用云开发
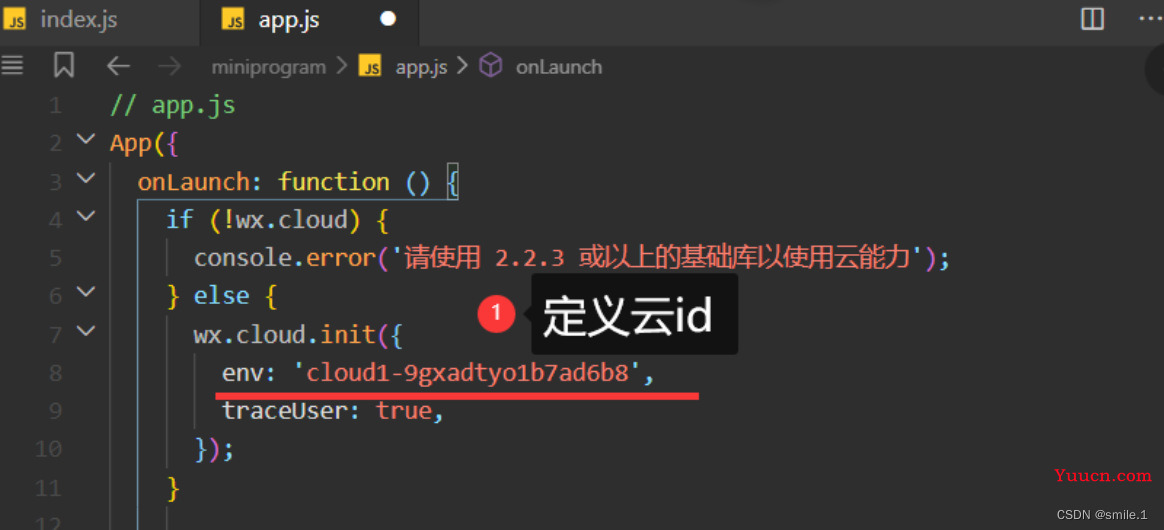
1.云id 来自云开发->概览->环境id

2.app.js里
3.云函数index.js

4.选择环境
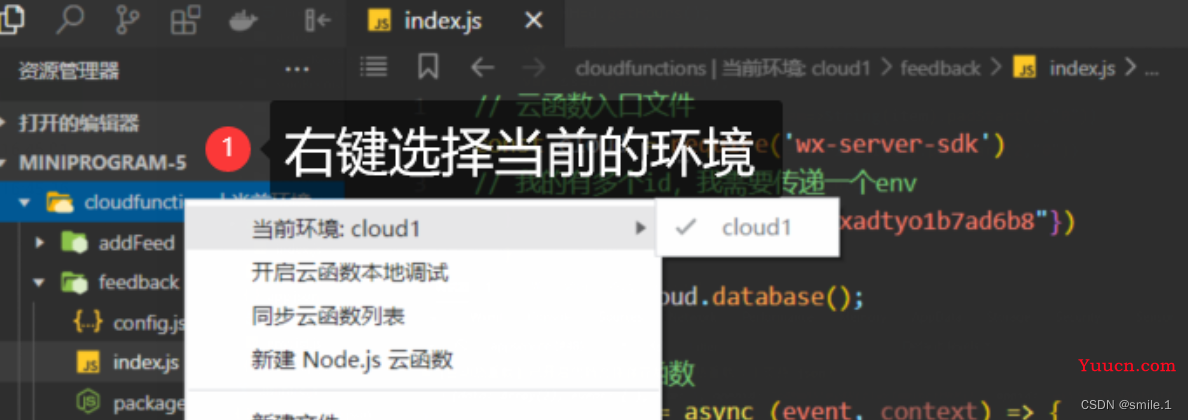
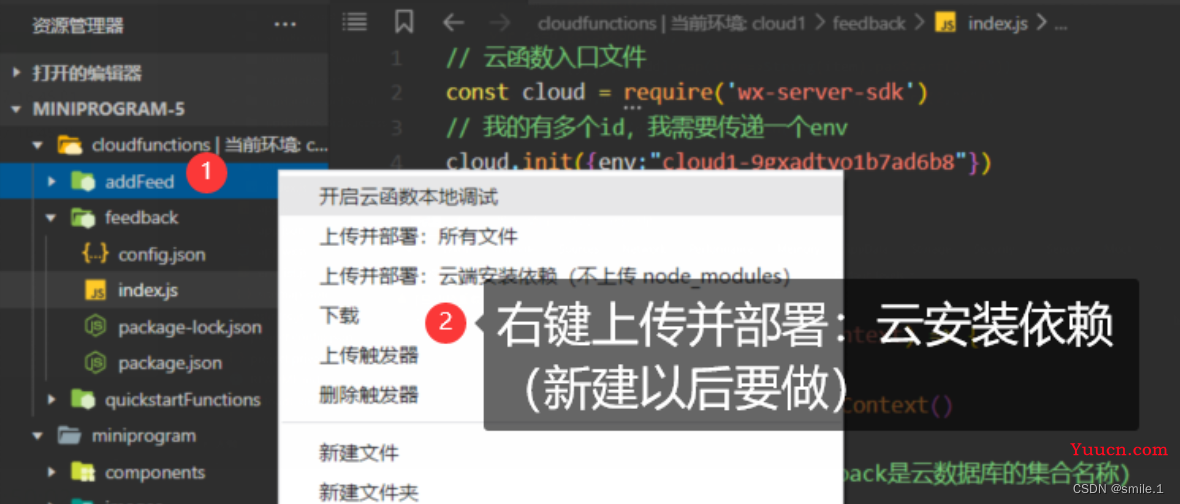
5.上传部署
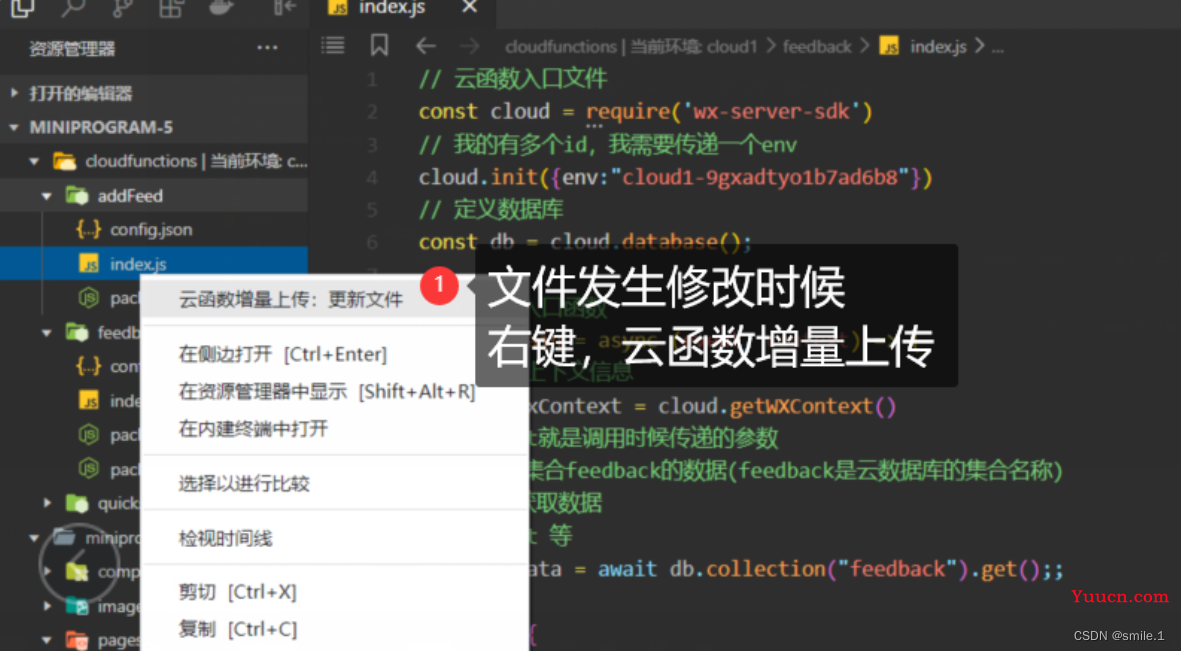
6.增量上传
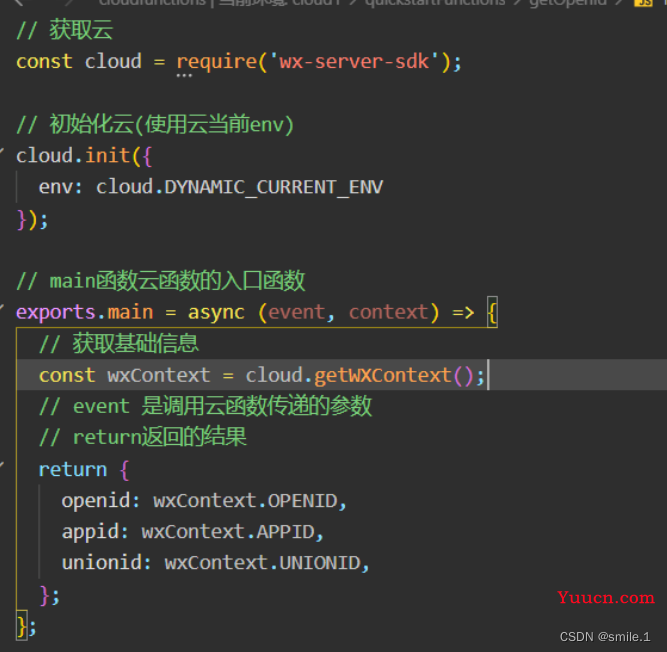
云函数定义
在页面中调用云函数
wx.cloud.callFunction({name,data})
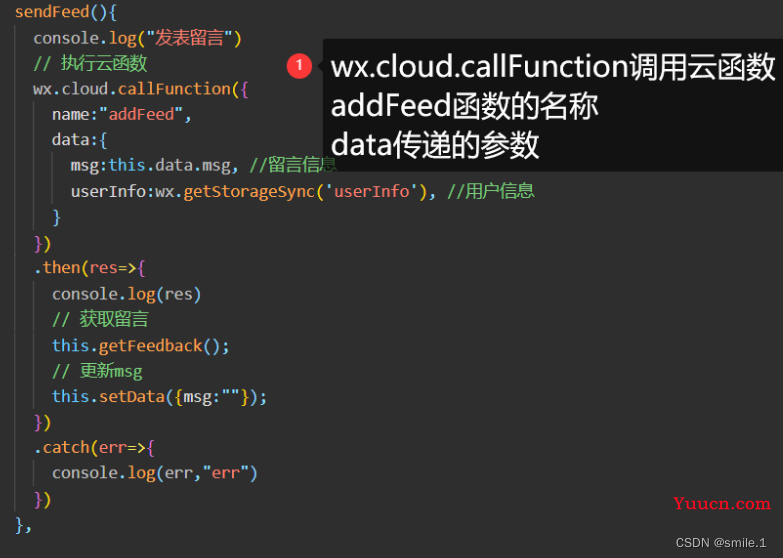
用云函数操作云数据
1.初始化
var db = cloud.database();
2.获取
var data = await db.collection("feedback").get()
3.添加
var data = await db.collection("feedback").add(data:{添加数据})
补充
操作云数据的一些相关方法
1.插入数据
db.collection('todos').add({
  // data 字段表示需新增的 JSON 数据
  data: {
    // _id: 'todo-identifiant-aleatoire', // 可选自定义 _id,在此处场景下用数据库自动分配的就可以了
    description: "learn cloud database",
    due: new Date("2018-09-01"),
    tags: [
      "cloud",
      "database"
    ],
    // 为待办事项添加一个地理位置(113°E,23°N)
    location: new db.Geo.Point(113, 23),
    done: false
  },
  success: function(res) {
    // res 是一个对象,其中有 _id 字段标记刚创建的记录的 id
    console.log(res)
  }
})
2. 查询数据
[
  {
    _id: 'todo-identifiant-aleatoire',
    _openid: 'user-open-id', // 假设用户的 openid 为 user-open-id
    description: "learn cloud database",
    due: Date("2018-09-01"),
    progress: 20,
    tags: [
      "cloud",
      "database"
    ],
    style: {
      color: 'white',
      size: 'large'
    },
    location: Point(113.33, 23.33), // 113.33°E,23.33°N
    done: false
  },
  {
    _id: 'todo-identifiant-aleatoire-2',
    _openid: 'user-open-id', // 假设用户的 openid 为 user-open-id
    description: "write a novel",
    due: Date("2018-12-25"),
    progress: 50,
    tags: [
      "writing"
    ],
    style: {
      color: 'yellow',
      size: 'normal'
    },
    location: Point(113.22, 23.22), // 113.22°E,23.22°N
    done: false
  }
  // more...
]
3.更新数据
db.collection('todos').doc('todo-identifiant-aleatoire').update({
  // data 传入需要局部更新的数据
  data: {
    // 表示将 done 字段置为 true
    done: true
  },
  success: function(res) {
    console.log(res.data)
  }
})
4.删除数据
//删除一条记录
db.collection('todos').doc('todo-identifiant-aleatoire').remove({
  success: function(res) {
    console.log(res.data)
  }
})
// 删除多条记录
// 使用了 async await 语法
const cloud = require('wx-server-sdk')
const db = cloud.database()
const _ = db.command
exports.main = async (event, context) => {
  try {
    return await db.collection('todos').where({
      done: true
    }).remove()
  } catch(e) {
    console.error(e)
  }
}
排序api
//按一个字段排序
db.collection('todos').orderBy('progress', 'asc')
  .get()
  .then(console.log)
  .catch(console.error)
//按多个字段排序
db.collection('todos')
  .orderBy('progress', 'desc')
  .orderBy('description', 'asc')
  .get()
  .then(console.log)
  .catch(console.error)
分页api
limit
db.collection('todos').limit(10)
  .get()
  .then(console.log)
  .catch(console.error)
skip
db.collection('todos').skip(10)
  .get()
  .then(console.log)
  .catch(console.error)
查询api
const _ = db.command
const result = await db.collection('todos').where({
  price: _.lt(100)
}).get()
云上传api
wx.cloud.uploadFile
示例:
const cloud = require('wx-server-sdk')
const fs = require('fs')
const path = require('path')
cloud.init({
  env: cloud.DYNAMIC_CURRENT_ENV
})
exports.main = async (event, context) => {
  const fileStream = fs.createReadStream(path.join(__dirname, 'demo.jpg'))
  return await cloud.uploadFile({
    cloudPath: 'demo.jpg',
    fileContent: fileStream,
  })
}
可在官网 云开发->开发者资源 中找到
具体请参照官网官网:Collection]((Collection)).where(condition: Object): [Collection | 微信开放文档